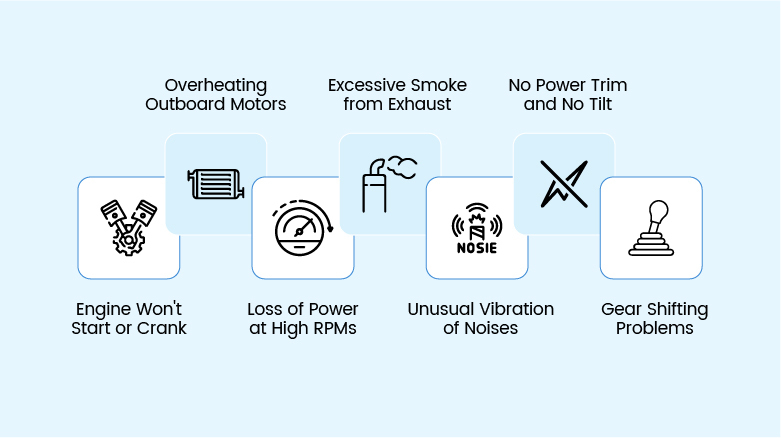
Troubleshooting and Fixing 7 Outboard Motor Problems
Any boat owner will tell you that the most critical part of their vessel is the outboard motor. It propels the boat, which is why it must be reliable and durable enough to withstand long days on the water. But like any mechanical and electrical part, it can encounter problems.
This has happened to all of us. You have planned a fishing day, but your outboard motor isn’t cooperating. Maybe it won’t start, or perhaps you are on water and the engine is overheating. These issues are enough to sour the trip and ruin the fun day.
If you keep up with your outboard maintenance, the chances of troubles are pretty low, and you might only encounter minor problems. In contrast, major problems can occur due to not keeping up with the maintenance schedule, which can stop you from going offshore.
This guide will equip you with the knowledge to understand your outboard’s symptoms, identify potential causes, and implement effective solutions to save you time, money, and the hassle of a stalled adventure. So, keep some essential tools and spare parts in the boat, and read our guide to fixing outboard motors.
1. Engine Won’t Start or Cranks But Doesn’t Catch
A non-starting engine is the most common and puzzling issue. It can be due to the fuel delivery system, battery, or spark plug; to find the root cause, you need to understand the engine.
Possible Causes
- Fuel System Issues: Clogged fuel filter, old or contaminated fuel, restricted fuel line, faulty fuel pump, or a clogged carburetor jet (on carbureted engines) or fuel injector (on fuel-injected engines).
- Ignition System Issues: Fouled or damaged spark plugs, cracked spark plug wires, faulty ignition coil, or a problem with the kill switch or safety lanyard.
- Battery Problems: Dead or weak battery, corroded battery terminals, or loose battery connections.
- Engine Flooding: Too much fuel in the cylinders, often caused by excessive priming or a faulty choke.
- Compression Issues: Worn piston rings, damaged valves, or a blown head gasket. (Less common for a no-start, but can contribute to poor starting.
Solutions
Tackling a non-starting outboard requires a systematic approach.
Start with the electrical system: verify battery voltage (it should be 12.6V or higher), then clean and tighten any corroded battery terminals. Test the starter motor and solenoid with a multimeter if you suspect they're at fault. Always ensure the kill switch lanyard is engaged correctly and the shift lever is firmly in neutral. Visually inspect all wiring for damage.
Next, move to the fuel system. Confirm your fuel level and, if you suspect old fuel, drain and replace it. Replacing the fuel filter is a highly recommended first step as it's a common and inexpensive fix. Inspect all fuel lines for kinks or cracks, and prime the bulb until it feels firm.
- For carbureted engines, a carburetor cleaning or rebuild kit might be necessary.
- For EFI systems, checking fuel pressure and inspecting injectors will be key.
If the problem still persists, then move to the ignition system. Remove and inspect your spark plugs for fouling, wear, or incorrect gapping, replacing them as needed. Use an inline spark tester to confirm spark at each plug; if absent, test ignition coils and check for CDI/ECM fault codes if applicable.
Finally, if the engine still won't start after addressing the fuel and spark issues, perform a compression test on all cylinders. Refer to your outboard's service manual for specific values. Low or inconsistent readings often point to internal engine wear, which typically requires professional diagnosis by a qualified mechanic.
How to Prevent It:
Prevention is always better than a cure.
- Invest in a marine battery tender to keep your battery optimally charged during periods of inactivity.
- Practice good fuel management by always using fresh, high-quality fuel.
- Incorporate a marine-grade fuel stabilizer into your fuel, especially during storage, to prevent degradation.
- Adhere to manufacturer recommendations for regular spark plug and fuel filter replacements.
2. Overheating Outboard Motors
Overheating is a serious issue that can lead to severe engine damage if not addressed promptly. It is often indicated by steam from the engine, a burning smell, or a warning light/alarm on your dashboard.
Possible Causes
- Clogged Water Intake: Debris (weeds, plastic bags) blocking the water intake screens/grate on the lower unit.
- Faulty Water Pump Impeller: The rubber impeller inside the water pump can wear out or break, reducing cooling water flow.
- Thermostat Issues: A stuck closed or faulty thermostat can prevent proper water circulation.
- Blocked Cooling Passages: Mineral deposits or corrosion can restrict water flow within the engine's cooling passages.
- Low Engine Oil: Insufficient engine oil can increase friction and heat.
Solutions
When your outboard overheats, the situation requires prompt response.
First, check the tell-tale stream – it should be constant and powerful. If it's poor or there is none, attempt to clear the tell-tale outlet with a wire. Then, check visually and remove any debris from the water intake grates at the lower unit.
If these easy steps fail, the next most probable fix is to replace the water pump impeller. It's such a frequent failure point that it must be routine maintenance, every year, independent of any visual indication of failure. Many seasoned boaters choose to replace the entire water pump kit (housing, gaskets, etc.) in the process. Shop OEM quality and original water-pump impeller and kits for all popular outboard manufacturers.
Also, you may have to test and/or replace the thermostat. Take it out and check it in hot water to determine if it opens at the right temperature. If overheating still occurs after these procedures, a complete flush of the cooling system is indicated to clear out deposits accumulated within the cooling passages of the engine.
How to Prevent It:
Preventive maintenance is key to avoiding overheating.
- The most critical step is annual water pump impeller replacement.
- Flush your engine with fresh water for at least 10 to 15 minutes after every use in saltwater or brackish water.
- Regularly inspect your water intakes and tell-tale stream before going out. It will also help you catch issues early.
3. Loss of Power or Poor Performance at High RPMs
An outboard that bogs down, struggles to reach its full RPM range or feels sluggish at higher speed is a clear indicator that something isn’t quite right. These problems are often caused by fuel delivery system, ignition or the engine’s internal health.
Possible Causes
- Fuel Delivery Issues: Clogged fuel filter, restricted fuel line, faulty fuel pump, or dirty fuel injectors/carburetor.
- Spark Plug Issues: Fouled, worn, or incorrectly gapped spark plugs.
- Propeller Damage: A bent, dinged, or incorrect propeller size can significantly impact performance.
- Air Intake Restriction: Clogged air filter or restricted air intake.
- Engine Compression Loss: Worn piston rings or valves.
- Incorrect engine timing, it is rare problem, but causes significant power losses.
Solutions
Fuel delivery issues are a primary suspect in these cases. This could be due to a restricted fuel flow due to a clogged fuel filter, a kinked fuel line, or a weak fuel pump failing to deliver adequate pressure.
- Dirty carburetor jets are common in carbureted engines, limiting fuel at higher throttle settings.
- For EFI systems, clogged or faulty fuel injectors can prevent proper fuel atomization and delivery.
The ignition system can also be a source of high-RPM power loss. A low spark at high RPMs indicates ignition coils or CDI/ECM parts could be failing under load. Further, incorrect ignition timing may also cause inefficient combustion and considerable loss of power.
Don't forget the propeller. The wrong pitch propeller will overload the engine, stop it from reaching optimal RPMs, and make it feel sluggish. So, thoroughly calculate the pitch for your boat propeller and choose the suitable size.
A damaged propeller with bent blades or chips, or a spun prop hub (where the rubber hub shears, causing the prop to slip), will severely impact performance and create vibration.
If the problem still persists than engine internal problems are direct cause of power loss. Low compression, as discussed earlier, significantly impacts power output.
Carbon buildup on pistons, cylinder heads, or exhaust ports can restrict flow and reduce engine efficiency. A restricted exhaust from carbon buildup in the passages or another blockage will choke the engine's ability to expel gases, leading to power loss.
How to Prevent It:
Prevention involves a few key practices.
- Make sure you have proper propeller. It shouldn’t be too big or too small for the boat. The one you get must be designed for its intended use.
- Implement decarbonization procedures recommended by the manufacturer.
- Always use quality fuel and timely change fuel filers to keep the fuel system clean.
4. Excessive Smoke from Exhaust
Smoke from your outboard’s exhaust is a clear visual signal that something is not right internally. The color of the smoke typically points to a specific underlaying problem. There can be three smoke colors: white, blue, and black.
Possible Causes
- Blue Smoke (Burning Oil): Worn piston rings, valve guide seals, or excessive oil in a two-stroke fuel mix.
- Black Smoke (Rich Fuel Mixture): Clogged air filter, faulty carburetor adjustment, faulty fuel injector, or a stuck choke.
- White Smoke (Steam/Coolant): A leaking head gasket or cracked engine block (serious issue).
Solutions
Addressing blue smoke involves internal engine diagnostics. Perform a compression test and potentially a leak-down test to assess the integrity of your piston rings and valve seals. For 2-strokes, carefully verify your oil/fuel mixing ratio and inspect the oil injection system for proper calibration or leaks.
To tackle black smoke, inspect and replace the air filter if it's dirty.
- For carbureted engines, clean or rebuild the carburetor.
- For EFI systems, using a diagnostic scanner to check for fault codes related to fuel system sensors is the next step.
For white smoke, first allow the engine to warm up to differentiate between normal condensation and a persistent problem. If the white smoke continues, perform a cooling system pressure test and inspect spark plugs for signs of water.
How to Prevent It:
Prevention involves meticulous maintenance.
- For 2-stroke engines, always adhere to the manufacturer's precise specifications for your oil-to-fuel ratio.
- 4-stroke and other outboard should follow regular engine maintenance schedules for oil changes, air filter inspection, and general tune-ups.
- Quality fuel also minimizes deposits that can eliminate smoking.
5. Unusual Vibration of Noises
Strange vibrations or persistent unusual noises from your outboard are clear indicators of a problem. These symptoms should never be ignored, as they can quickly escalate into more significant problems.
Possible Causes
- Propeller Damage: A bent or damaged propeller.
- Loose or Worn Mounts: Engine mounts that are loose or worn can cause excessive vibration.
- Worn Bearings: In the lower unit or crankshaft.
- Internal Engine Issues: Rod knock, piston slap (serious).
- Misaligned components is a less common cause that typically occurs after maintenance
Solutions
Start by inspecting the propeller. Remove it and thoroughly check for any visible damage. To check for a spun hub, make a clear mark across the prop and the hub with a pen, then run the engine under load. If the marks separate, the hub is spun and needs replacement. Ensure the propeller is correctly installed and torqued to specifications.
Next, check the lower unit. Drain the lower unit oil and inspect it carefully for any metal shavings, which indicate gear or bearing wear. Also, check for water intrusion, which turns the oil milky. If significant metal or water is present, professional inspection and repair or replacement of the lower unit are required.
Examine the engine mounts for any signs of cracking, tearing, or excessive play in the rubber components; replace them if they appear deteriorated.
Finally, go through the engine and boat to tighten any loose components such as bolts, clamps, or covers that might be vibrating. For serious internal engine noises like knocking or loud tapping, professional diagnosis by a marine mechanic is essential.
How to Prevent It:
- Regularly inspect propeller before and after each outing.
- Annual lower unit oil changes are crucial as they provide fresh lubrication but also allow for early detection of water intrusion or metal shavings.
- Periodically inspect engine mounts for signs of wear.
6. No Power Trim and No Tilt
A non-functional power trim and tilt system makes launching, retrieving, and operating your boat inconvenient. It can even be a safety concern in shallow water, because you cannot adjust the angle of your outboard for optimal performance or lift it out of the water.
Possible Causes
- Electrical Issues: Blown fuse, corroded wiring, faulty trim/tilt switch, or a dead battery.
- Low Hydraulic Fluid: Insufficient hydraulic fluid in the trim/tilt reservoir.
- Faulty Trim Motor: A damaged or seized electric trim motor.
- Mechanical Obstruction: Something physically blocking the trim/tilt mechanism.
Solutions
Before inspecting anything, check for physical obstruction. Is there anything stuck or something is preventing the motor to move from inside the motor.
If everything clears out, then begin by addressing the electrical system. Locate and inspect the trim/tilt fuse, which is often found near the battery or on the engine's main fuse panel; replace it if it's blown.
Thoroughly inspect all wiring for corrosion or loose connections, paying particular attention to connections at the battery, trim relays, and the trim motor itself. You can test trim relays with a multimeter or by swapping them with a known good relay. Ensure your battery has sufficient charge to power the trim motor.
Next step is the hydraulic system. Check the trim fluid reservoir level and top it off with marine-grade trim fluid. Look for any visible leaks around the trim cylinders and hoses. If the trim motor hums but the engine doesn't move, it suggests a hydraulic problem like a malfunctioning pump or a serious leak.
If there's no sound when you change the position then the trim motor is damaged and might need to be replaced. Finally, visually clear any obstructions that might be physically preventing the engine from tilting.
How to Prevent It
- Proactive steps include regularly checking and topping off your trim fluid level.
- Keep all electrical wiring and connections clean and corrosion-free.
- Keep the trim unit clean and free from marine growth and debris.
7. Gear Shifting Problems
Smooth gear engagement is essential for safe and efficient boat operation. Problems can range from stiff or difficulty shifting gears. The issue might be minor, but it can have significant internal problems.
Possible Causes
- Incorrect Cable Adjustment: Gear shift cables can stretch or become misadjusted over time.
- Corroded Cables: Corrosion or lack of lubrication can make cables stiff and difficult to move.
- Lower Unit Issues: Damaged shift rod, worn clutch dogs, or internal gear damage in the lower unit.
- Propeller Shaft Issues: Bent propeller shaft.
Solutions
To diagnose, first inspect the shift cable. Disconnect the shift cable at the engine and manually try to shift the lower unit by moving the shift lever on the engine itself. If the lower unit shifts smoothly, the problem is likely the cable or the control box.
Inspect the cable for kinks, fraying, or excessive stiffness. Lubricate or replace it if necessary. Then, adjust the shift cable tension precisely according to your service manual.
Next, check the lower unit. Drain the lower unit oil and inspect it carefully for any metal shavings (indicating internal wear) or water intrusion. Replace the oil if it's contaminated. If the cable is confirmed good but shifting is still difficult internally, professional inspection and potentially repair of the lower unit's shift mechanism are needed.
Finally, verify that your engine's idle speed is within manufacturer specifications. An idle that's too high will definitely cause grinding when shifting gears.
How to Prevent It:
The best method is the routine maintenance.
- Keep you shift cables well lubricated to prevent corrosion and stiffness.
- Perform annual lower unit oil changes. This is crucial for lubrication and allows you to catch early signs of internal wear.
- Make sure that the engine idle speed is adjusted to the manufacturer’s recommended RPM.
Learn: How to prevent corrosion in outboard motors?
Preventive Maintenance Checklist
Consistent preventive maintenance is the best way to avoid most outboard motor problems and extend the life of your engine. Every 2-stroke and 4-stroke outboard engine should stick to regular preventive maintenance.
- Regular oil and filter changes: Change oil and filters at least every 100 hours or once a year or follow the manufacturer guidelines for changing engine oil, lower unit oil, and fuel filters. Use OEM filters and marine-rated oil. Changing oil and filters is a great way to extend engine life and performance.
- Use fuel stabilizers during Winterization: Use marine-rated fuel stabilizers anytime your boat is stored and during long lay-up periods between use. Fuel stabilizers help stabilize control fuel degradation and prevent gumming and varnish from forming in the carburetors/injectors.
- Flush your engine after using saltwater: Critical for saltwater boaters, because you will have salt deposits and corrosion. Flush your engine with fresh water for 10-15 minutes after every use in saltwater to remove salt build-up and keep the cooling system clean.
- Lubricating moving parts: Check your owner's manual for all the grease or lubrication points (all grease points, pivot points, propeller shaft, throttle and shift cables, control cables). Regularly lubricate as per your owner's manual is vital for smooth operation and avoiding excessive wear.
- Check and clean the prop: Periodically inspect your prop for dings, bent blade, or fishing line wrapped around the shaft. Also, check for marine growth or debris and clean it off. It's always a good idea to keep a spare prop aboard! For peace of mind, you may want to carry other replacement tools.
Conclusion
Understanding the common symptoms, underlying causes, and practical solutions for outboard motor problems is an invaluable skill for any boater. While many may require a professional certified marine mechanic, others can be diagnosed and resolved with basic tool and a systematic approach.
The most important thing is to prioritize preventive maintenance and gaining knowledge about outboard motor parts and how to effectively troubleshoot and fix these problems. It will not only save you time and money, but also deliver a more reliable and enjoyable experience on the water.
Always keep some common and essential outboard parts stocked in your garage or boat.
If you are looking for some quality outboard parts - new and used to remamanufactured, check out our extensive collection and get you back on the water quickly and confidently.
Posted by Brian Whiteside