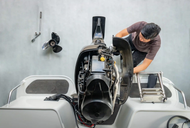
Springtime Boat & Outboard Checklist
When spring comes and the walleye bite on the river starts you’ll want to make sure your outboard is ready and to go!
After a long winter’s nap, there are some things that need to be checked before your outboard ever sees the water. AND... You don’t have to be a mechanic genius or even be mechanically inclined to get your own outboard ready for use in the spring!
Click HERE to install the FISHBRAIN Fishing App
Inspection the Engine Oiling System
If you have a 4-stroke outboard: Check the oil level and for water in your engine oil.
Key Steps:
- Access the dipstick: Remove the engine cowl to access the dipstick.
- Tilt the engine: Tilt the outboard slightly upwards to allow oil to drain back into the crankcase.
- Check the oil level: Pull out the dipstick and read the oil level against the markings.
- Add oil if needed: If the oil level is low, add oil until it reaches the recommended level on the dipstick.

If you have a 2-stroke outboard: Check the oil level and for debris in the oil tank.
Key Steps:
- Locate the oil tank, usually on the engine itself, and visually inspect the oil level; most engines have a visible mark on the tank indicating the proper oil level.
You can also check the oil flow by disconnecting the oil line and turning the ignition on to see if oil is being pumped out consistently; always consult your engine manual for specific instructions on checking the oiling system for your particular model.
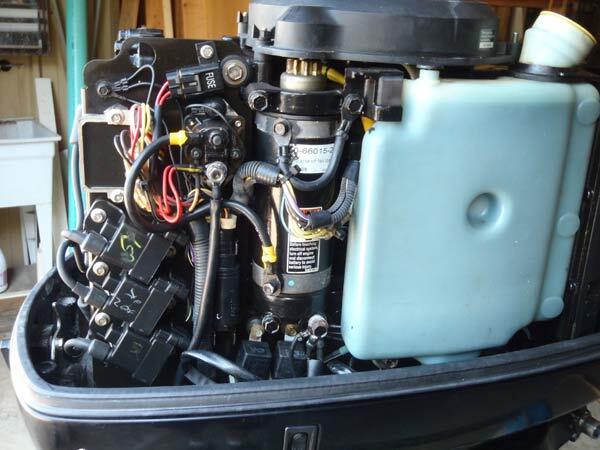
- Check for debris. I have witnessed the plastic seal, which has come off a bottle of oil get in the oil system and completely block the oil flow ending with powerhead failure.
- Almost all Mercury and Yamaha outboards have clear oil lines allowing you to see that it is all oil with no air or gas in the line. If a check valve goes out on a Mercury engine, it can actually back-feed fuel into the oil system. It will push oil all the way back through the pump and into the small engine mounted oil tank. This can cause severe engine damage.
If you see water or debris you will want to remove it. Some oil systems have oil filters on them and this is also a good time to change that if it’s been a while or if you’ve never done it before. Now that you know you have good oil going to the engine, make sure your oil lines are full of oil.
Unwelcome Visitors
Check to see if there were mice or other critters taking refuge in your outboard over the winter. If you find any of these unwelcome visitors, kick them out and check for any damage. For some reason, one of a mouse’s favorite foods, seems to be wire coating.
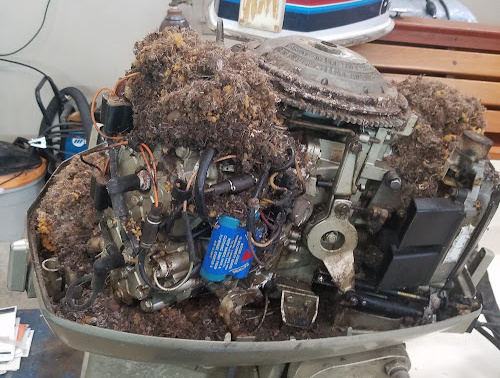
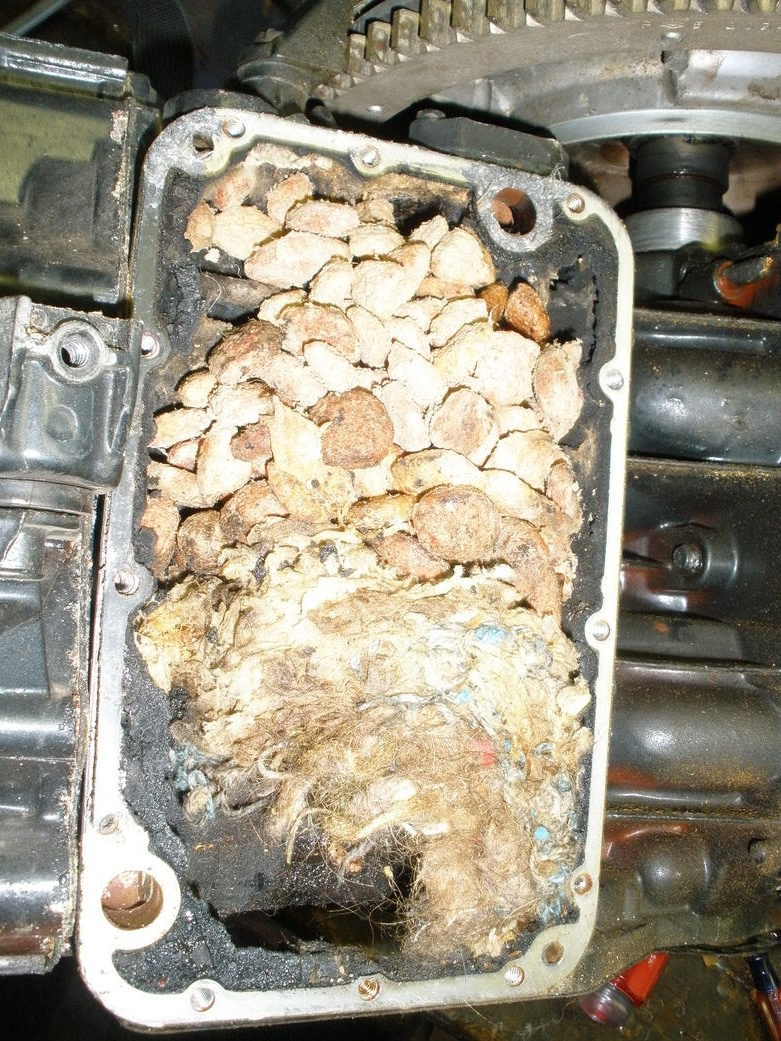
Mice also like to go through the prop hub up the mid-section and build a nest in the engine cylinders. This is a VERY bad thing, but as long as your engine was properly fogged in fall, you won’t have to worry about it, as mice don’t enjoy lying on oil.
The only way to check for this, other than cranking the engine, is to pull the spark plugs and look for evidence of mice. This is also a good time to change the spark plugs anyway.
Inspect the Engine Fuel System
Inspect your fuel system for leaks or damage. Check hose connections and tank surfaces. If you see any signs of softness or cracking, replace the damaged components. Ensure all fittings and clamps are secured.
Confirm that your engine exhaust and ventilation systems are in functioning order.
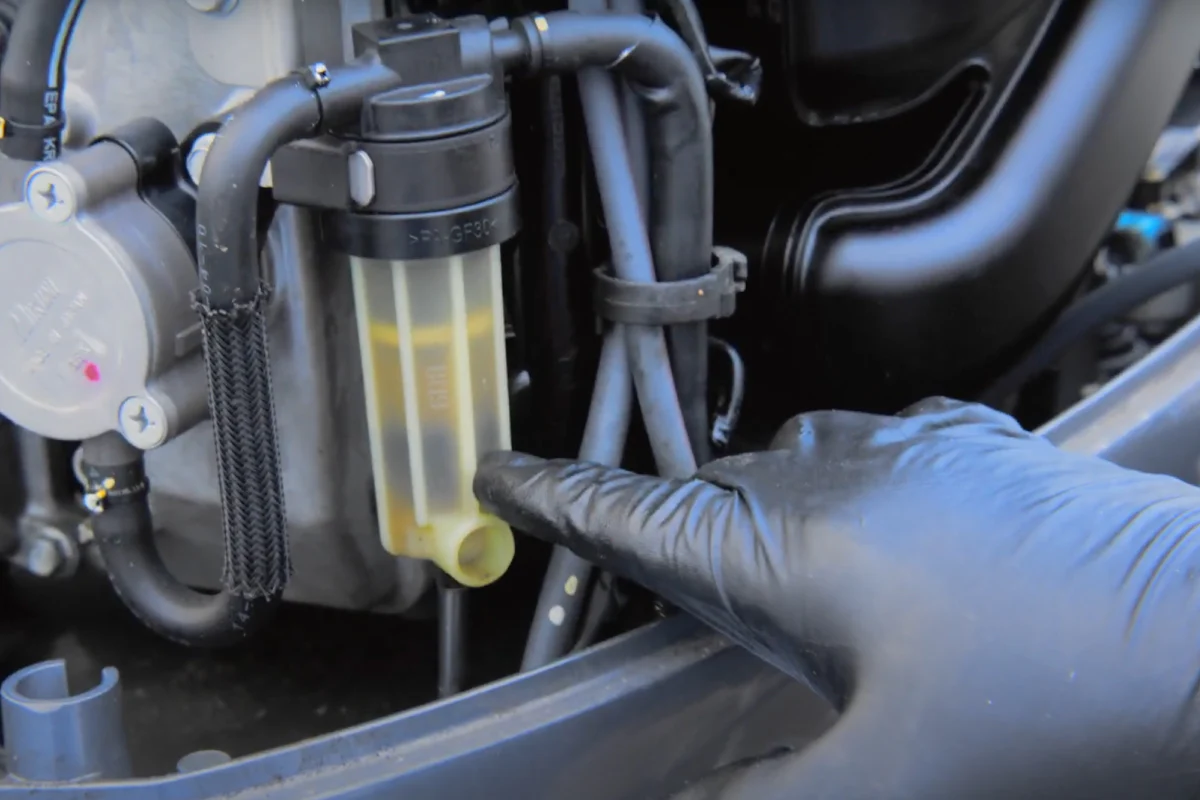
If you forgot to stabilize it, I would recommend starting with fresh fuel in your tanks. This is also a great time to change out or clean your fuel filters on your boat and in your engines fuel system.The highly advanced fuel systems we have today do not do well with contaminates, like water or debris, whether it be from the gas station or filings from the inside of a new fuel tank.
Finally, check your owner’s manual for any specific instructions on starting your engine after winter storage.
Inspect the Belts, Cables and Hoses
Inspect the belts, cables and hoses. They can become brittle and crack during winter storage. Verify that the belts fit tightly around pulleys and are not worn. Swells and cracks on the outer jacket of the throttle, shift and steering control cables could indicate internal corrosion. Replace as necessary.
Belt maintenance does not just apply to 4-stroke engines. There are several models of two strokes that have belts that require maintenance for optimal performance as well. A Mercury Optimax and a Yamaha HPDI both have belts running part of their fuel system. If a belt breaks, your engine will not run as well as it should.

These belts should be checked and adjusted periodically. Timing belts pn outboards are supposed to be replaced every 1000 hours or 5 years as well. You can get more time out of them but if you wait too long, and your belt breaks, you more than likely will cause severe engine damage.
In fact, this situation will more than likely result in complete powerhead failure. This is something that I don’t think a lot of people think about but many of these engines don’t run a timing chain like many car engines. They run a cogged belt that stretches and breaks down over time which is why it will need to be changed now and then.
Inspect the Engine Electrical Systems
An outboard's electrical system’s job is to carry voltage from one place to another.
If the voltage can’t make the journey, or if it’s diminished when it gets there, the receiving device will not function properly, if at all. The goal is to have as much voltage (or electrical energy) arrive at Point B as left Point A.
As electricity passes through a device, some parasitic loss is normal. However, corrosion impedes electricity’s ability to travel, which can cause significant voltage loss or intermittent voltage.
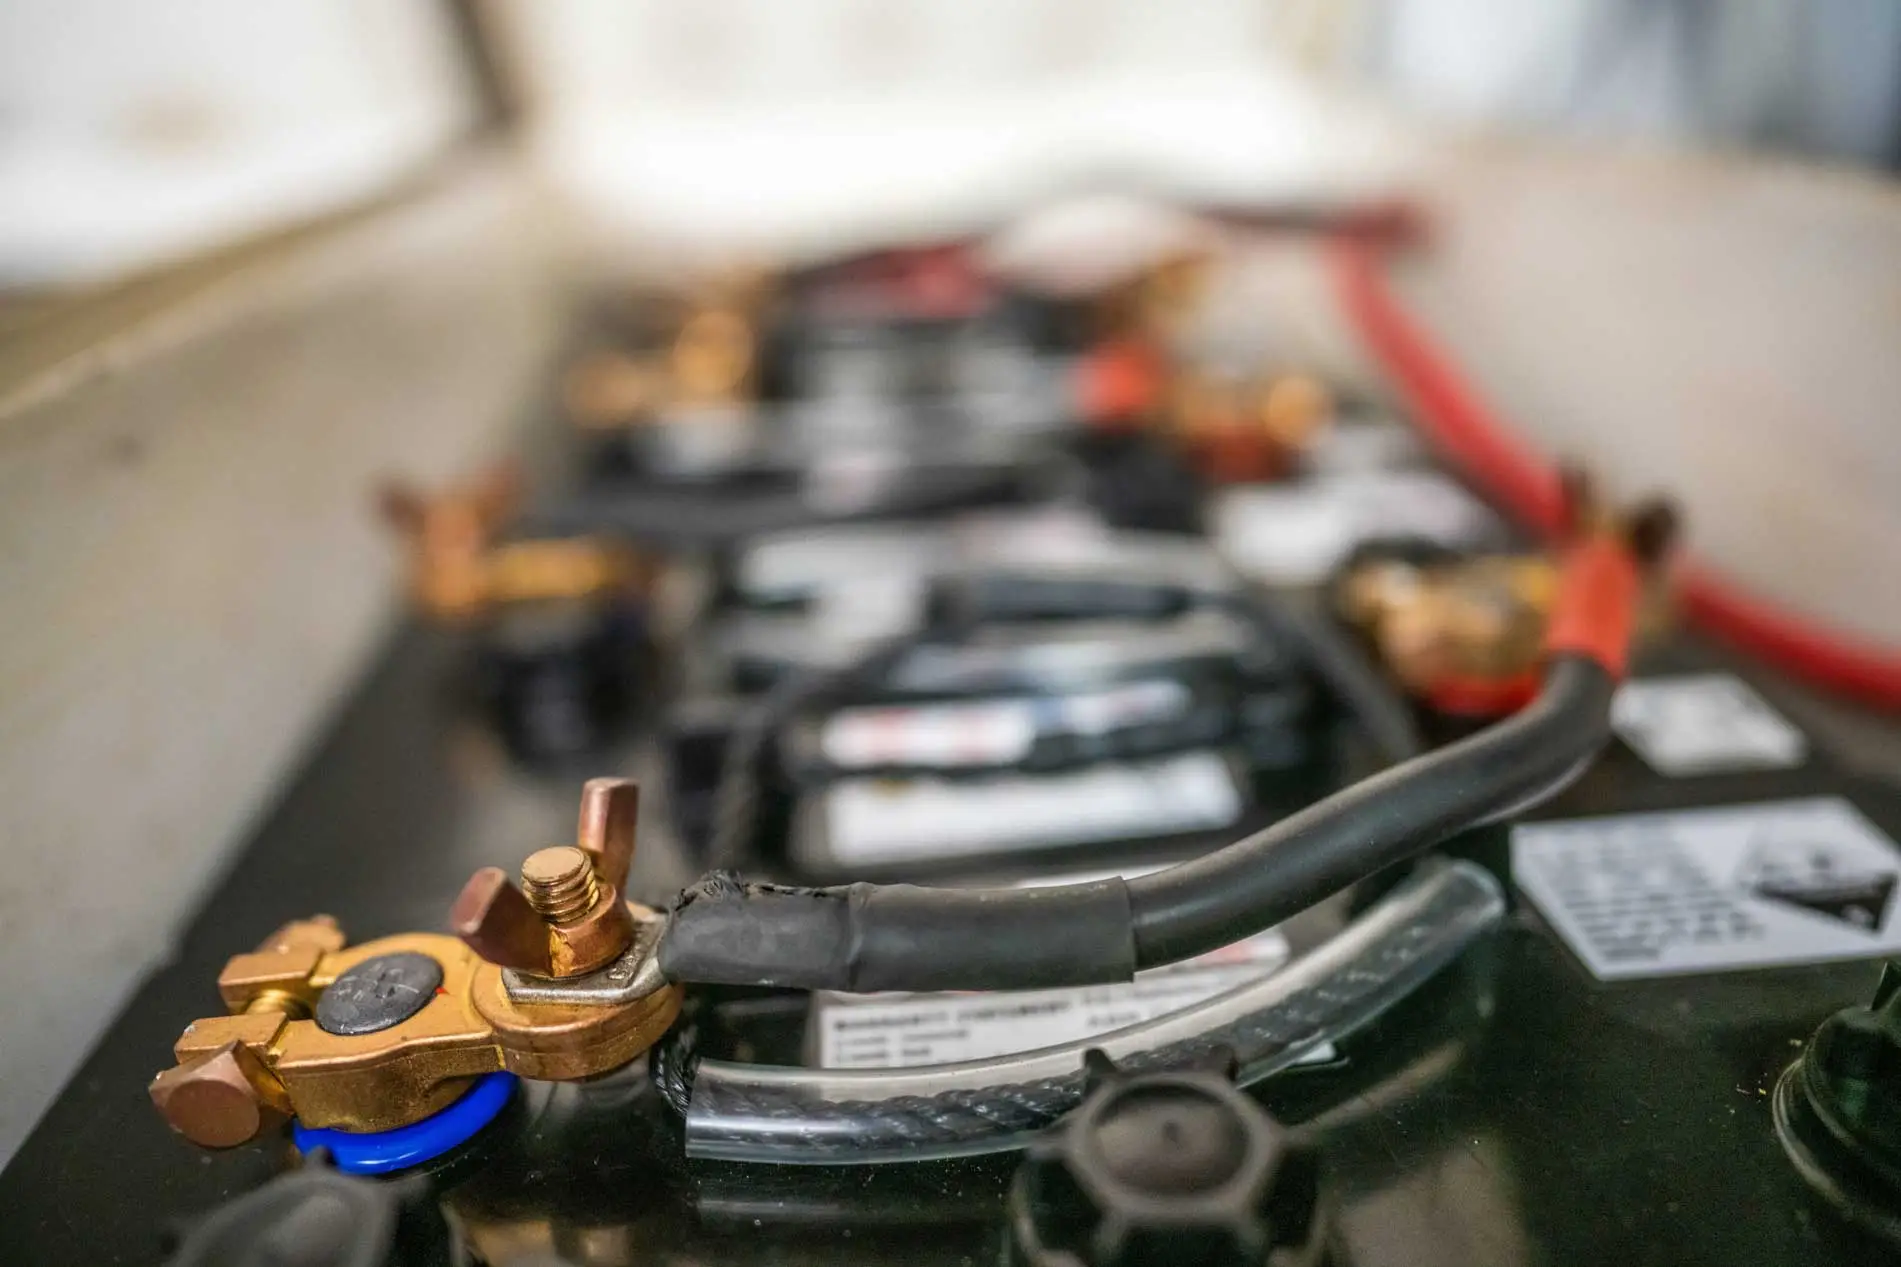
- Inspect the batteries. If corrosion is evident, remove and clean terminals with baking soda solution, clean cable ends and reconnect.
- Load test all batteries.
- Check the battery switches to be sure they are functional. Older switches can wear out.
- Inspect battery cable connections to each switch.
- Check breakers and/or fuse panels.
- Inspect bus bars for corrosion. Wire brush clean if needed.
- Check all helm switches including trim tabs, power trim and tilt to be sure they are operational.
- Check all lights. If you’ve planned on switching over to LEDs, this is a good time
- Check all navigational, sonar and communications electronics to be sure they are operational. Pay specific attention to connections to be sure they are tight. Radio antenna connections are notorious for corroding. Inspect all wires and cables.
- Make sure the automatic bilge pump float switch works correctly.
- Finally, replace any burnt out light or console bulbs.
Inspect the Trim Tabs
Inspect the trim tabs, screws, bolts and rams. If you keep the boat in the water the trim tabs should be treated with an antifouling coating seasonally. Check the hydraulic cylinders for any sign of leakage. Inspect the hydraulic lines, the pump and fluid reservoir. Top off with the recommended fluid if needed.
Inspect the Steering System
Non-power assisted systems have a small fill cap on the pump body behind the steering wheel. Power assist systems are checked at the pump reservoir. Check fluid level and top off as needed. Inspect all hydraulic hose connections to be sure they are tight and there are no leaks. If it was necessary to remove any steering lines or replace the ram end caps at the engine, the system will have to be bled.
Check the Engine Fluid Levels
Check all your fluid levels, including power steering, power trim reservoirs, coolant and engine oil. Examine the bilge area for fluid leaks. Check lines for cracking and replace damaged parts. If you used anti-freeze in your fresh water tank, be sure to flush it out and disinfect the system
before connecting the pump to the water lines.
Inspect the Propeller(s)
1. Safety first: Before starting, ensure the engine is turned off, and the boat is securely anchored, docked or out of the water. Wear gloves to protect your hands
2. Remove the propeller: If the propeller is attached, carefully remove it by loosening the nut or bolts that hold it in place. Use an appropriate wrench or socket set.
3. Clean the propeller: Inspect the propeller for any debris such as fishing line or seaweed wrapped around the shaft or blades. Use a brush or rag to clean any buildup.
4. Inspect the blades: Check each blade for any damage, such as cracks, nicks, bends, or missing pieces. Even small damages can impact the performance of the propeller. Make sure to check the trailing edge, leading edge, and blade tips.
5. Check for wear: Look for signs of wear on the leading edge and trailing edge of each blade. Excessive wear can indicate that the propeller needs to be replaced or repaired.

6. Inspect the hub: Examine the hub of the propeller for any damage or wear. The hub connects the blades to the propeller shaft, so it's crucial for the propeller's performance. Make sure it's not bent, cracked, or worn.
7. Look for cavitation: Check for any pitting or erosion on the surface of the blades, which can indicate cavitation. Cavitation occurs when the propeller spins too quickly, causing bubbles to form and implode on the surface of the blade. If you find any significant damage, consult your local dealer.
8. Check for balance: Place the propeller on a flat surface and spin it gently. If it wobbles or vibrates excessively, it may be out of balance and need to be repaired or replaced.
9. Inspect the propeller shaft: While the propeller is removed, inspect the propeller shaft for any damage or wear. Look for corrosion, pitting, or bending that could affect the performance of the propeller.
10. Reinstall the propeller: Once you've completed the inspection and any necessary repairs or cleaning, reinstall the propeller carefully, making sure it's securely tightened. Refer to your owner's manual for torque specifications.
11. Test the propeller: After reinstalling the propeller, start the engine and run it in neutral to ensure that the propeller spins smoothly and there are no unusual vibrations or noises.
Inspect the Engine Tilt & Trim System
If your tilt and trim unit fails to operate in the spring, here are a few troubleshooting tips that should help identify the problem, or point you in the right direction.
If you try to raise or lower the engine and nothing happens, first check that your battery is fully charged and that the battery switch is in the “on” position.
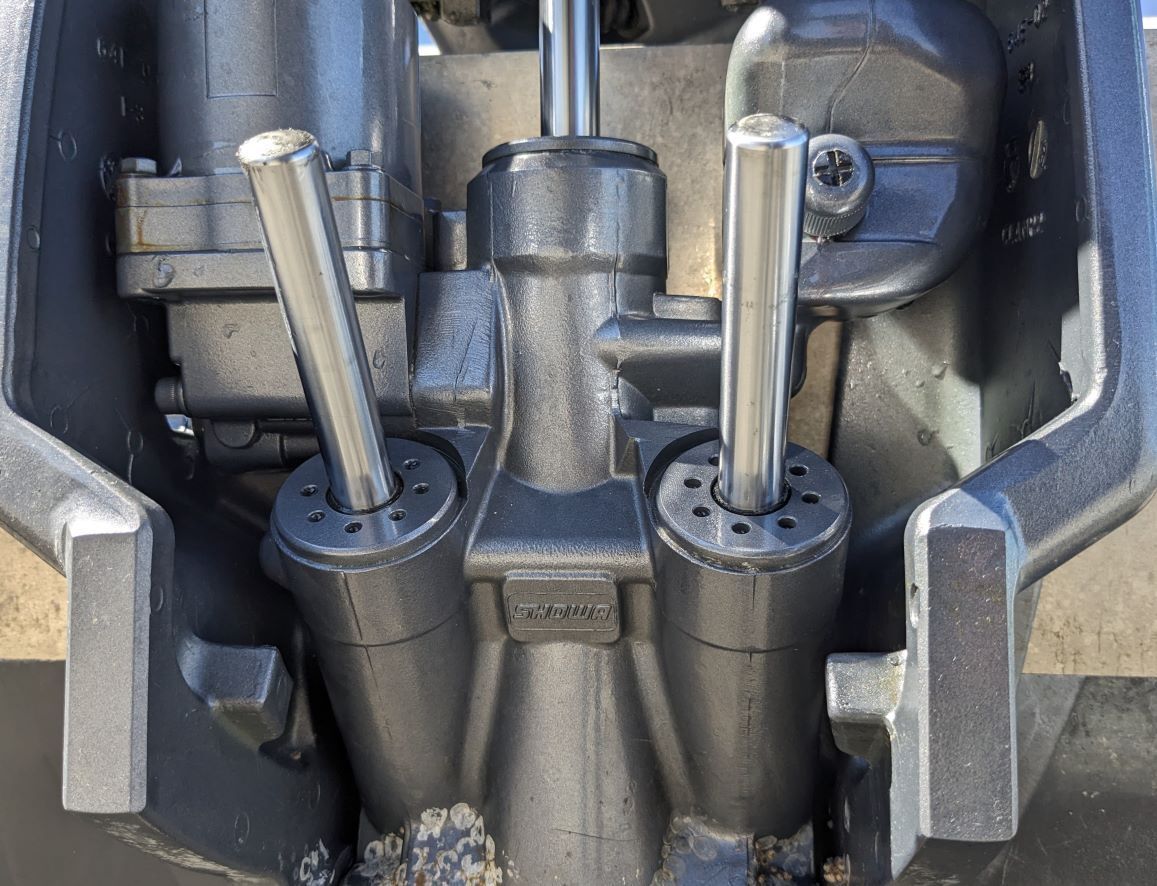
Then determine whether the problem lies with the electric tilt & trim motor or the hydraulic pump/assembly. Listen for the solenoid starter relay while operating the helm control (tilt) switch up or down. If you hear nothing, the problem will typically be with the tilt switch, solenoid, or with the wires or connections between the two. Depending on the system, a blown fuse is also a possibility, so check any fuses first as part of your initial checks (and always carry spares).
If your engine has an integral tilt/trim switch, test operation of that. If the tilt/trim function is operational using the integral switch, that proves the tilt/trim system itself is functional and that the problem lies with the helm switch or its associated wiring and components. If you hear a slight clicking noise while pressing the helm tilt/trim switch, that means you have power from the control switch to the solenoid or relay. The next step is to check operation of the power tilt and trim motor itself.
To test the motor, first remove power to it by disconnecting the blue and green wires. Unplug the quick-disconnect plug between the motor and solenoid (if one is provided) or disconnect the two wires where they connect to the solenoid or relay. Once disconnected, use a jumper wire to apply 12 volts DC directly to the appropriate wire. If the engine is in the down position, energize the blue wire (which should raise it). If in the raised position, connect the jumper to the green wire to lower it.
Inspect the Boat Hull
While inspecting the hull, look for blisters distortions and cracks. Clean the hull, deck and topsides using an environmentally safe cleaning solution. Touch up any areas where the paint is looking worn. Wax the hull to preserve the paint – it can extend the life of your paint by two or three seasons.

Clean windows, canvas, Bimini and dodger. If mold or mildew have snuck under your cover, scrub accordingly. You’ll want to use protective gear to avoid getting spores on your skin.
Inspect Your Safety Gear
Check your life jackets – make sure they are in good condition and that you have enough and the right sizes for all potential passengers. Examine your fire extinguishers, are they full charged? Make sure you have the correct class and quantity for your vessel. If you have an enclosed area, install a working carbon monoxide detector. If you have an EPIRB (Emergency Position Indicating Radio Beacon) run it through your regular testing and maintenance. If you don’t have one, consider acquiring one to alert search and rescue in the event of an emergency.
- Inspect all PFDs and throwable life rings aboard for mildew. Clean if needed.
- For inflatable PFDs, check charging system.
- Inspect all flares, paying attention to expiration dates. If expired, purchase replacements.
- Inspect the life raft, checking for required inspection date. Bring it in to a certified service facility if needed.
- Check to see if fire extinguishers are fully charged and take a look at their physical condition.
- Conduct a safety check of all EPIRB and PLB units to be sure they are operational and to check the battery integrity.
- Review the literature to see when battery replacement is recommended by the manufacturer.
- Conduct a safety check of the emergency S.O.S. system on the VHF radio if applicable.
General Vessel Systems Inspection
- Inspect all thru-hull fittings from inside and outside the boat.
- Check all thru-hull shut-off valves to be sure they are working.
- Lubricate if necessary, replace if frozen. Inspect all hoses from thru-hull fittings.
- Be sure they are all double-clamped and that the clamps are not corroded.
- Check bilge pumps and automatic bilge pump switches.
- Check additional pumps (washdown; macerator; etc.).
- Inspect your anchor line for wear around the thimble linking it to the chain or anchor.
- Check the shackles to be sure the screw is not rusted tight.
- Remove the line from the anchor locker and inspect.
- Clean anchor locker while empty.
- Inspect outer hull for chips, dings, gelcoat blisters. Repair as needed.
- Inspect hardtop/t-top pipes as welds can break with age and hard vessel use.
- Inspect places where wires enter and exit the piping in case grommets are bad or missing, which can cause chafing.
- Inspect the sanitation system (head and holding tanks) where applicable to be sure they are working.
- Remove antifreeze if it was winterized.
- Remove antifreeze from the freshwater system where applicable, flush with clean, fresh water and refill.
If you run into any problems or tasks you may find outside your comfort zone, bring the boat into a professional who can safely address them.
The United States Coast Guard also has a mobile app available that allows you to request a vessel safety check from the U.S. Coast Guard Auxiliary and can determine what safety equipment you are required to carry by law.
Need Outboard Parts? Marine Parts Warehouse can quickly help you get your outboard ready for spring fishing!
Posted by Frank Abagnale Jr.

