Installing an Outboard Rigging Tube

Outboard rigging tubes protect these critical connections from wear, damage, and UV deterioration. The ribbed plastic conduit is flexible enough to move as an outboard turns or tilts, yet is sturdy and kink-resistant. It also makes for a tidier motor installation.
The first step is to procure the parts, which include a rigging flange (such as the Sierra Part No. 18-7962 or T-H Marine Part No. RF-1CP-DP) for the point where the rigging bundle emerges from the boat, an adapter for the engine rigging port, and the tube. This will be 2- or 2 ½-inch OD, depending on the engine brand. Make sure the flanges and adapters match the diameter of the rigging tube.
Tools And Supplies
- Rigging hose ($79.99 per 10 feet of 2-inch OD (Outer Diameter)
- Rigging flange (Sierra 18-9762)
- Rigging flange with fuel hose port to accommodate fuel primer bulb (Sierra 18-9674)
- Rigging flange hose union to accommodate fuel primer bulb (Sierra 18-9763)
- No. 10 stainless-steel screws (3)
- Phillips screwdriver
- Socket wrench set
- Tape measure
- Power drill and 1/8-inch bit
- Marking pencil
- Marine silicone sealant
You can begin by tilting down the outboard and removing the engine cowling. (You might need to remove the lower engine pan, too.) Disconnect the battery cables from the battery posts. Now disconnect any cables, wires, hoses, and tubes that run through the rigging port to the engine. Pull all the rigging away from the engine.
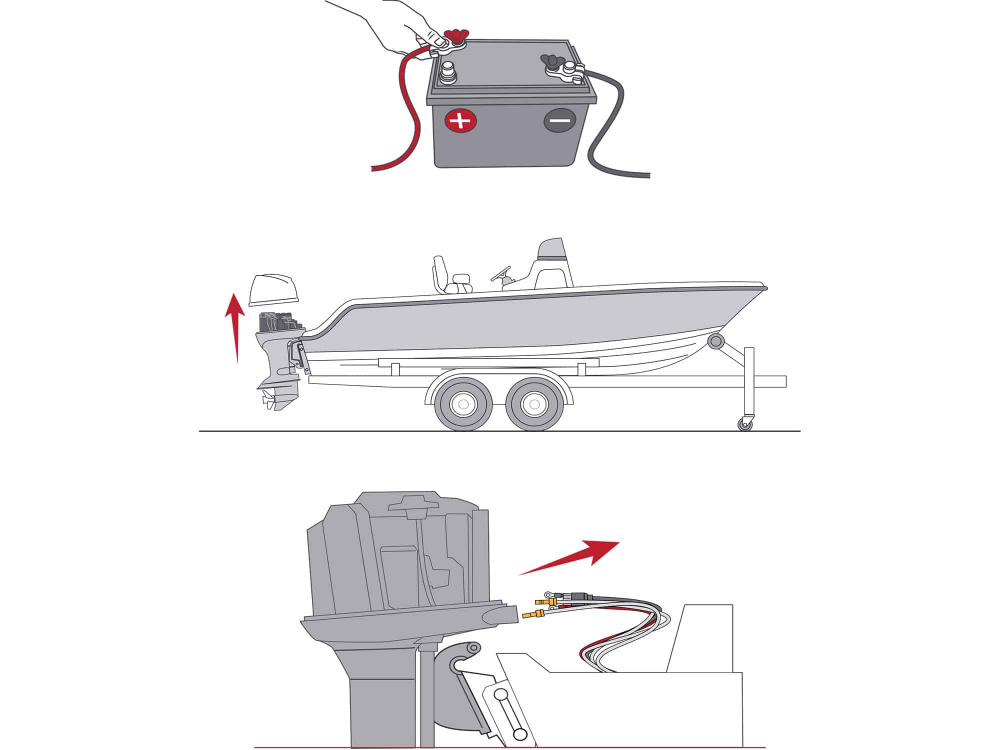
Plug the disconnected fuel hose with a clamped bolt to prevent spills. Remove the old rigging boot from the boat, and slide it down and off the rigging bundle. Patch or seal any screw holes left from the old rigging boot.
The tube should be long enough to easily reach between the rigging port and the boat as the engine sweeps from side to side and tilts up and down. Use the length of the existing bundle between the engine and boat as a baseline, then add 2 inches. Trial-fit the tubing before you cut the hose to length.
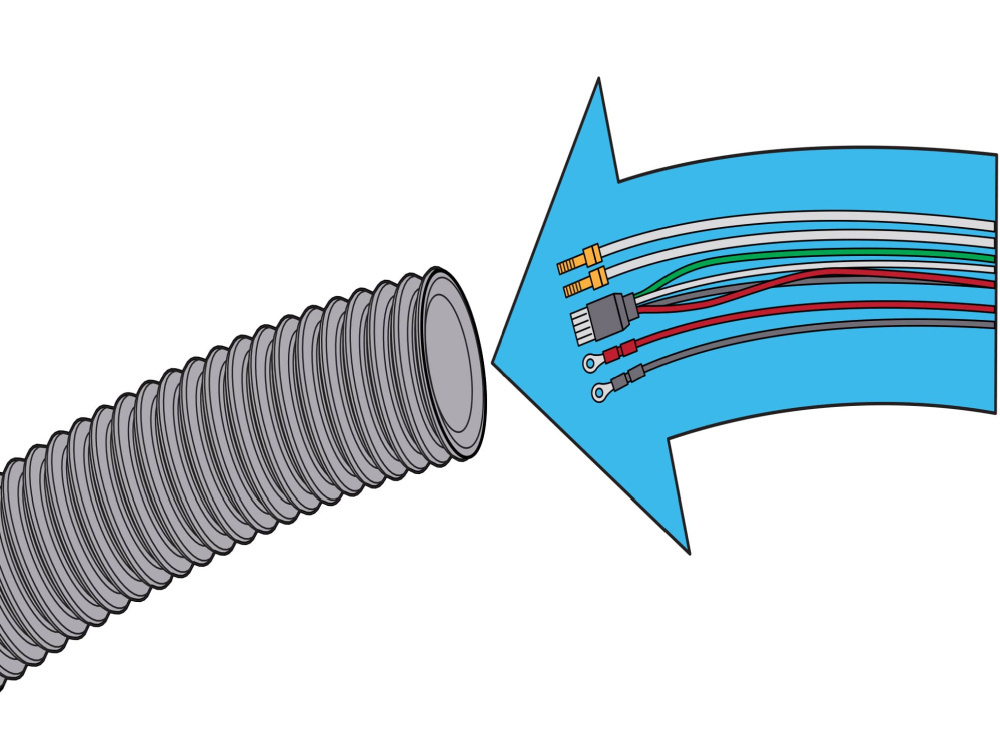
Cut off any zip ties and remove any protective sheathing from the rigging bundle. Then, snake it through the new rigging tube components: first, through the rigging flange, then through the rigging tube, and finally through the engine rigging port adapter. You may need to use an electrician’s snake or pull cords to thread the items through the tube. If required, first snake the larger-diameter items, such as the main electrical harness, which often has a large plug on the end, then the smaller ones.

Position the rigging flange over the existing rigging hole on the boat. Use the flange as a template to mark and then drill three 1/8-inch holes. Take special care not to drill into any of the rigging behind the bulkhead.
Bed the flange with marine silicone sealant, then install the part with No. 10 stainless-steel pan- or truss-head Phillips screws that are short enough that they don’t protrude inside and possibly damage parts of the rigging. Thread the rigging tube into the mouth of the newly installed rigging flange.
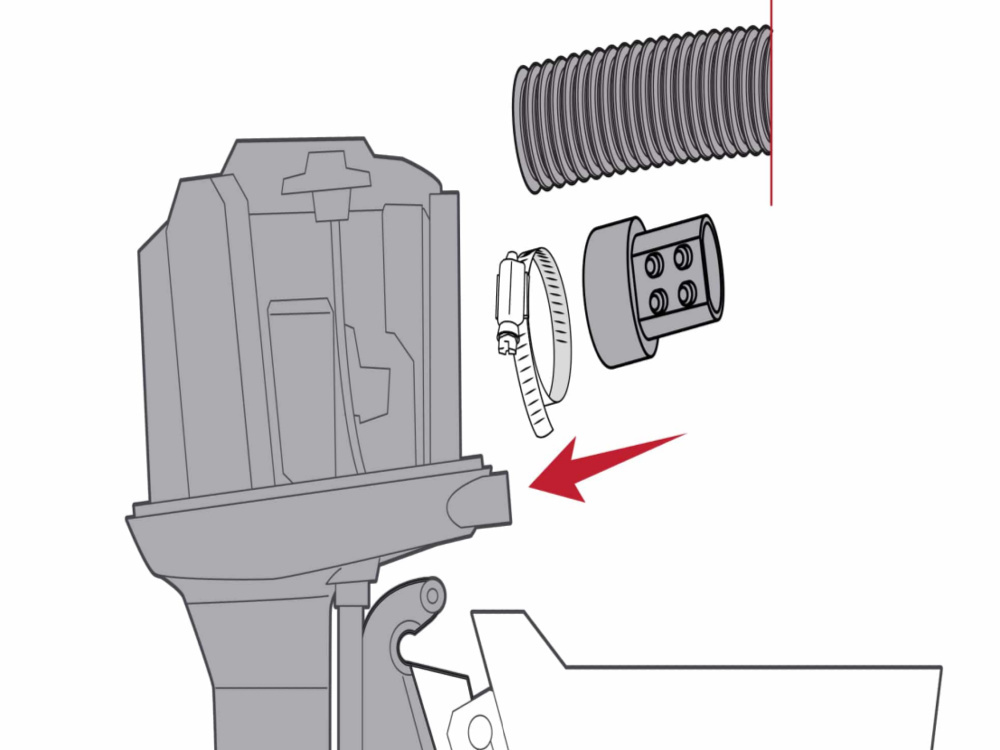
Ensure you have the adapter that fits your engine's rigging port. You might need to obtain this part and instructions from the outboard company. Contact your outboard company to determine which one is correct.
Each adapter secures differently. Once the adapter is installed, reinstall the lower pan and reconnect all of the cables, wires, tubes, and hoses. Reinstall the cowling. Connect the battery cables, and exercise the tilt, trim, and steering to ensure the tube does not bind and that it isn’t excessively loose.
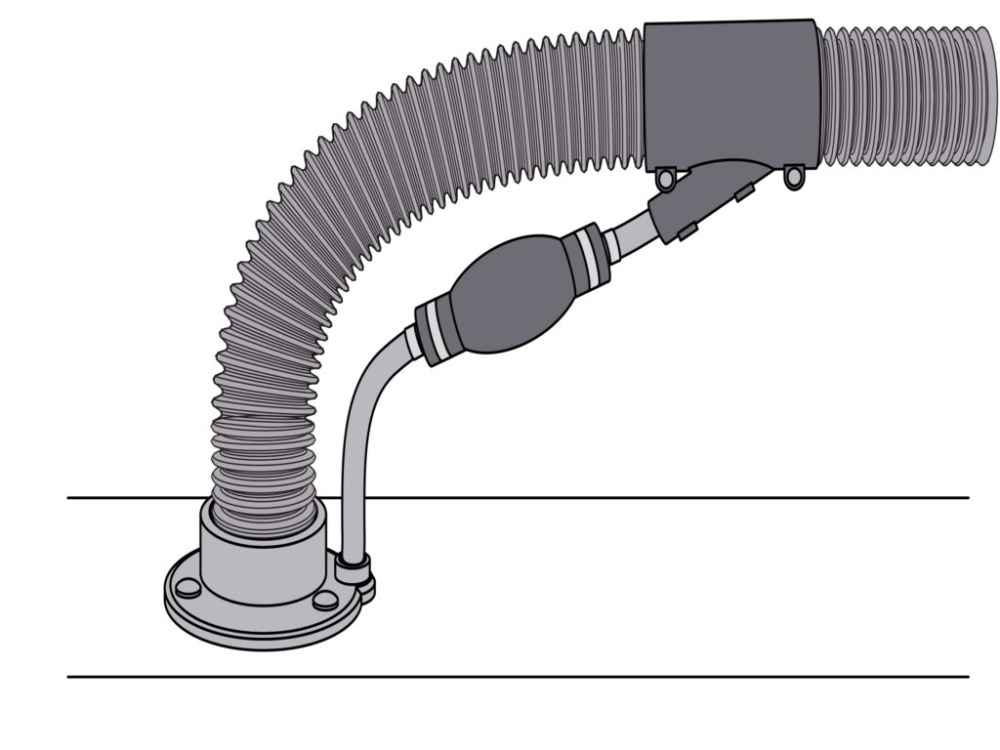
When there’s a fuel primer bulb between the engine and boat, a special rigging flange, such as the T-H Marine Part No, RFFHP-1-DP provides a separate port for the fuel line, and the T-H Marine Rigging Flange Hose Union Part No. RFHU-1-DP allows the fuel line to re-enter the rigging tube downstream of the primer bulb.
The clamp-on hose union requires drilling a hole in the rigging tube for inserting the fuel hose; do this before any rigging components are inside the tube.
Looking for a specific part? Please send us an email!
www.customerservice@marinepartswarehouse.com
Posted by Carl Winslow