Yamaha 2-Stroke Outboard Season Breakout: Pre-Season Maintenance
Getting your Yamaha 2-Stroke ready for the season isn’t just about turning the key and hoping for the best. It requires a little more effort; there are essential checks and steps to go through if you want your Yamaha 2-stroke outboard to be at its peak once it’s back up and running.
This Yamaha 2-Stroke Outboard Season Breakout Guide walks you through every critical step to ensure your motor fires up smoothly after winter storage.
Why Pre-Season Prep Matters for Yamaha 2-Stroke Owners
Any outboard motor, even a resilient Yamaha 2-stroke, following months of inactivity, requires proper attention. Suitable pre-season maintenance after outboard winterization avoids corrosion, stale fuel problems, and wear that can result in expensive downtime down the road.
A thoroughly done Yamaha outboard pre-season checklist helps:
- Extend the life of your outboard engine
- Guard against rust and carbon residue
- Avoid cold-start and stalling issues
- Optimize fuel combustion and cooling
- Increase engine life and enhance throttle response
Step-by-Step Yamaha 2-Stroke Outboard Spring Startup Checklist
Let’s dive into the essential Yamaha 2-Stroke Outboard Breakout guide. The comprehensive steps ensure a safe, smooth season breakout for maximum reliability.
External Visual Inspection
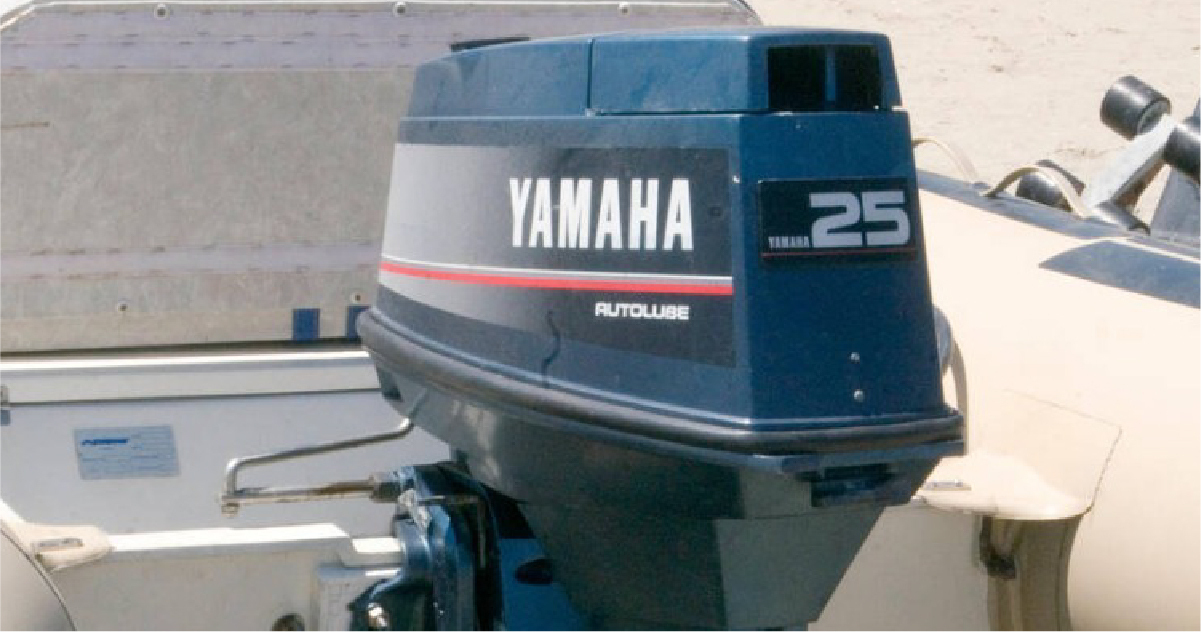
Alamy/picturesbyrob
Start with the essential visual inspection and protection.
- Inspect the outside of the outboard for scratches or scrapes, particularly on the lower unit, which is prone
- to underwater strikes. If you find any damage or corrosion, fix the area, and prime and repaint it as needed. Moreover, remove all the debris, fishing lines, birds, or rodents' nests, and insects from the outboard motor’s body.
- Inspect the zinc anodes and replace any that have corroded beyond 50% of their original size.
- Wash and wax the exterior. A couple of coats of marine wax protects the paintwork and fiberglass from UV damage and make your outboard shiny.
Powerhead Season Breakout Maintenance Checklist
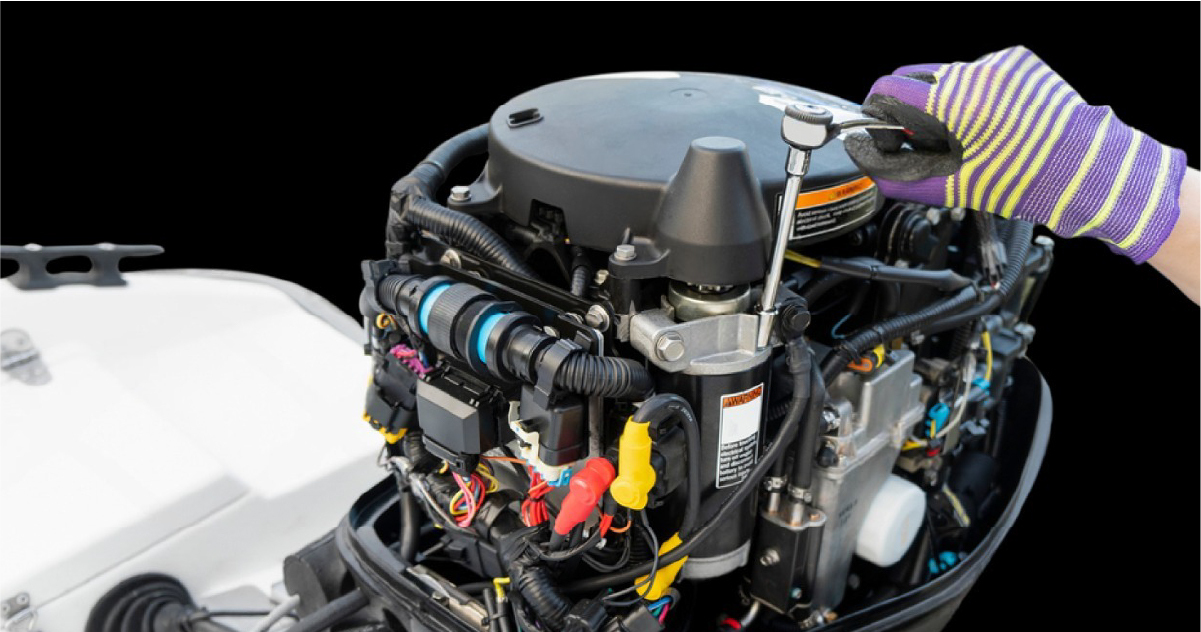
ShutterStock/BigTunaOnline
Remove the top cowling and give the powerhead a thorough inspection. It’s not unusual for wildlife such as rodents, birds, and bugs to nest inside the engine cowling, so remove any unwanted guests. Here are the things that you should do when inspecting the Yamaha outboard 2-Stroke powerhead.
- Examine the quality and level of the engine oil. If it appears milky, replace it, and remember to replace the oil filter as well.
- Take out the Spark Plugs and check for fouling (black, oily residue). Clean or replace them with the appropriate gapped plugs for your model.
- Look at the wiring for chewing, burns, and corroded connectors. All of the connections should be secure, and replace any loose, corroded, or damaged wiring.
- Inspect the hoses for cracks or bulges. Check the ends for leaks and ensure the clamps and connections are secure. Replace any worn, corroded, or loose hoses and clamps.
How to Prepare the Lower Unit for Season Breakout

ShutterStock/InFocus.ee
The most common signs of damage in a 2-stroke Yamaha outboard motor are water intrusion.
Check the propeller for bent, distorted, or cracked blades, as well as for pitting and corrosion. Replace the propeller if it's pitted or damaged, make sure the prop nut is tight, and the nut’s cotter pin is in place.
Change the gear lube if you have not changed it before winterization. Often, the oil level is down, so you may have to top it off to optimal levels. If the oil is milky or cloudy, it indicates water contamination, meaning the seal replacement is needed before launch. Find the essential seal kits at OBParts to protect your engine.
Another thing that you might have to replace is the Yamaha water pump impeller. If the tell-tale stream is weak or the impeller is 2 years old, you should replace it before going in the water. It is the most common cause of engine overheating.
Pro Tip: Inspect the water pump housing and seals while changing the water pump impeller to prevent future issues.
Learn: How Suzuki and Yamaha Outboard Engines Compare
Electrical Power and Fuel System Spring Maintenance
Electrical parts and the fuel system play a crucial role in a smooth startup. It’s essential to inspect every aspect of these systems, as minor damage can lead to an unpleasant experience.
- Battery and Connection: Fully charge the battery using a dedicated battery charger. Clean and tighten all terminal connections, look for deformities, and check the main fuse on your ignition system.
- Fuel Integrity: If your fuel was not treated with a high-quality fuel stabilizer, you should consider draining the tank and starting with fresh fuel and the proper 2-stroke oil mixture.
- Filters and Lines: Replace all in-line and on-engine fuel filter elements. Inspect the fuel line and primer bulb for any hardening or cracking caused by ethanol or age.
Engine Flushing and Running
This is the moment of truth!
Put the engine in neutral and make sure that the safety lanyard is attached.
- Secure the flushing muff over the water intake on the lower unit and turn on the hose (never run your engine without a water supply).
- Prime the primer bulb until it's firm and use the choke as needed for a cold start.
- Once the engine starts, immediately confirm a steady, strong stream from the Tell-Tale. This confirms the cooling system is engaged. If the stream is weak or non-existent, shut down immediately and investigate the water pump.
- After fixing the issues, run the engine at an elevated idle for about 10 minutes to reach the operating temperature and burn off the fogging oil. Cycle the shifter briefly into forward and reverse to check the gear engagement.
Don’t worry if your 2-Stroke Yamaha Outboard smokes on startup; it’s just residual fogging oil burning off.
Troubleshooting Common Yamaha 2-Stroke Season Breakout Issues
Even after a careful breakout, 2-Stroke Yamaha may pose problems. These are the most common problems that you may encounter when taking the first test run on water.
1. Hard starting or stalling
Probable Cause: Gummed-up carburetor from old fuel, stale fuel without a fuel stabilizer, and air in the fuel line or a weak primer bulb
Solution:
- Pump the primer bulb until firm to ensure proper fuel pressure.
- Empty the carburetor bowls and refill them with fresh fuel.
- Replace or clean spark plugs and verify a consistent spark will fire on all cylinders.
- If the motor stalls out, perform a compression test to ascertain the health of the cylinders.
Pro Tip: Use a marine fuel stabilizer regularly to reduce varnish and fuel breakdown.
2. Weak water flow
Probable Cause: Clogged water intakes, damaged impeller, or a kinked/collapsed water intake hose.
Solutions:
- Remove any debris from the water inlets.
- If the intakes are clean, chances are the water pump impeller is worn out or failed, and should be replaced before running the outboard again.
- Flush the cooling system with clean water for 10-15 minutes with flushing muffs.
If the water is flowing slowly, shut down the motor immediately because a strong stream from the tell-tale is critical for cooling the engine.
3. Rough idle
Probable Cause: Fouled spark plugs, restricted fuel flow, or unbalanced fuel/air mixture
Solution:
- Check the spark plug gaps and look for heavy fogging oil. If plugs are fouled, replace them.
- After cleaning the carburetor, check all intake manifold gaskets and vacuum lines for air intake.
- If the problem persists, rebuild or clean the carburetor using a Yamaha-approved kit if performance doesn’t improve.
Rough idle is often an early warning sign of carburetor or ignition issues.
4. Electrical no-start
Probable Cause: Dead battery, loose connections, or safety switch
Solution:
- Confirm that the battery is completely charged
- Clean and tighten all battery connections and terminals to the ignition system
- Shifter is firmly in neutral, and the kill switch lanyard is securely attached.
For reliable starts, change weak batteries or corroded terminals.
5. Fuel Leaks or Strong Gas Smell
Probable Cause: Broken fuel lines or loose clamps, malfunctioning primer bulb check valve, or leaking carburetor bowl gasket
Solution:
- Examine all fuel hoses, clamps, and the primer bulb for any cracks or softness.
- Tighten clamps or replace worn parts without delay
- Look under the cowling for moisture; a slow leak can lead to dangerous vapors
Fuel leaks are a fire hazard; always use ethanol-resistant marine-grade hoses to replace damaged lines.
Maintenance Tips to Keep Your Yamaha 2-Stroke Running Strong All Season
Regular upkeep will save you a lot of trouble down the road.
- Use OEM-grade fogging oil and fuel stabilizer: Use reputable marine-specific products.
- Flush the engine with clean water: Always flush the Yamaha outboard with clean water after using it in salt or contaminated water.
- Grease fitting and check lower unit oil once a month: Apply a few pumps of marine gearcase to the steering, tilt, and swivel points to keep these points lubricated properly.
- Inspect the spark plugs and fuel filter regularly: A quick visual inspection can identify small problems before they become bigger problems.
Final Thoughts
A successful Yamaha 2-Stroke Outboard Breakout is all about preparation. Utilizing this Yamaha 2-Stroke De-winterizing checklist will protect your investment, prevent mid-season breakdowns, and ensure smooth operation throughout the entire boating season.
Beyond the Yamaha breakout procedures, you should always pick either genuine Yamaha outboard parts or replacement parts of OEM quality. It is imperative to get the correct fitting parts and performance standards of the factory specifications.
Now your Yamaha 2-Stroke Outboard is ready to hit the water, enabling you to make plans for a trip with family and friends.
Posted by Brian Whiteside